Some views are simply too big for a single photo. A mountain range at sunset. The full sweep of a coastline. Your extended family spread across a wide garden. The grand interior of a cathedral. These are the moments you want to remember in their full scale — not cropped down to fit one frame.
Photoshop Elements has a built-in tool called Photomerge Panorama that takes a series of overlapping photos and stitches them into one wide, seamless image. It handles the difficult parts automatically: aligning the frames, correcting lens distortion, and blending the joins so they disappear. You supply the photos; it supplies the engineering.
This guide covers every part of the process — from how to take the photos in the first place, through every layout option and setting in the Photomerge dialog, to cleaning up the result and printing it large.
Where to find Photomerge Panorama
You can reach it two ways:
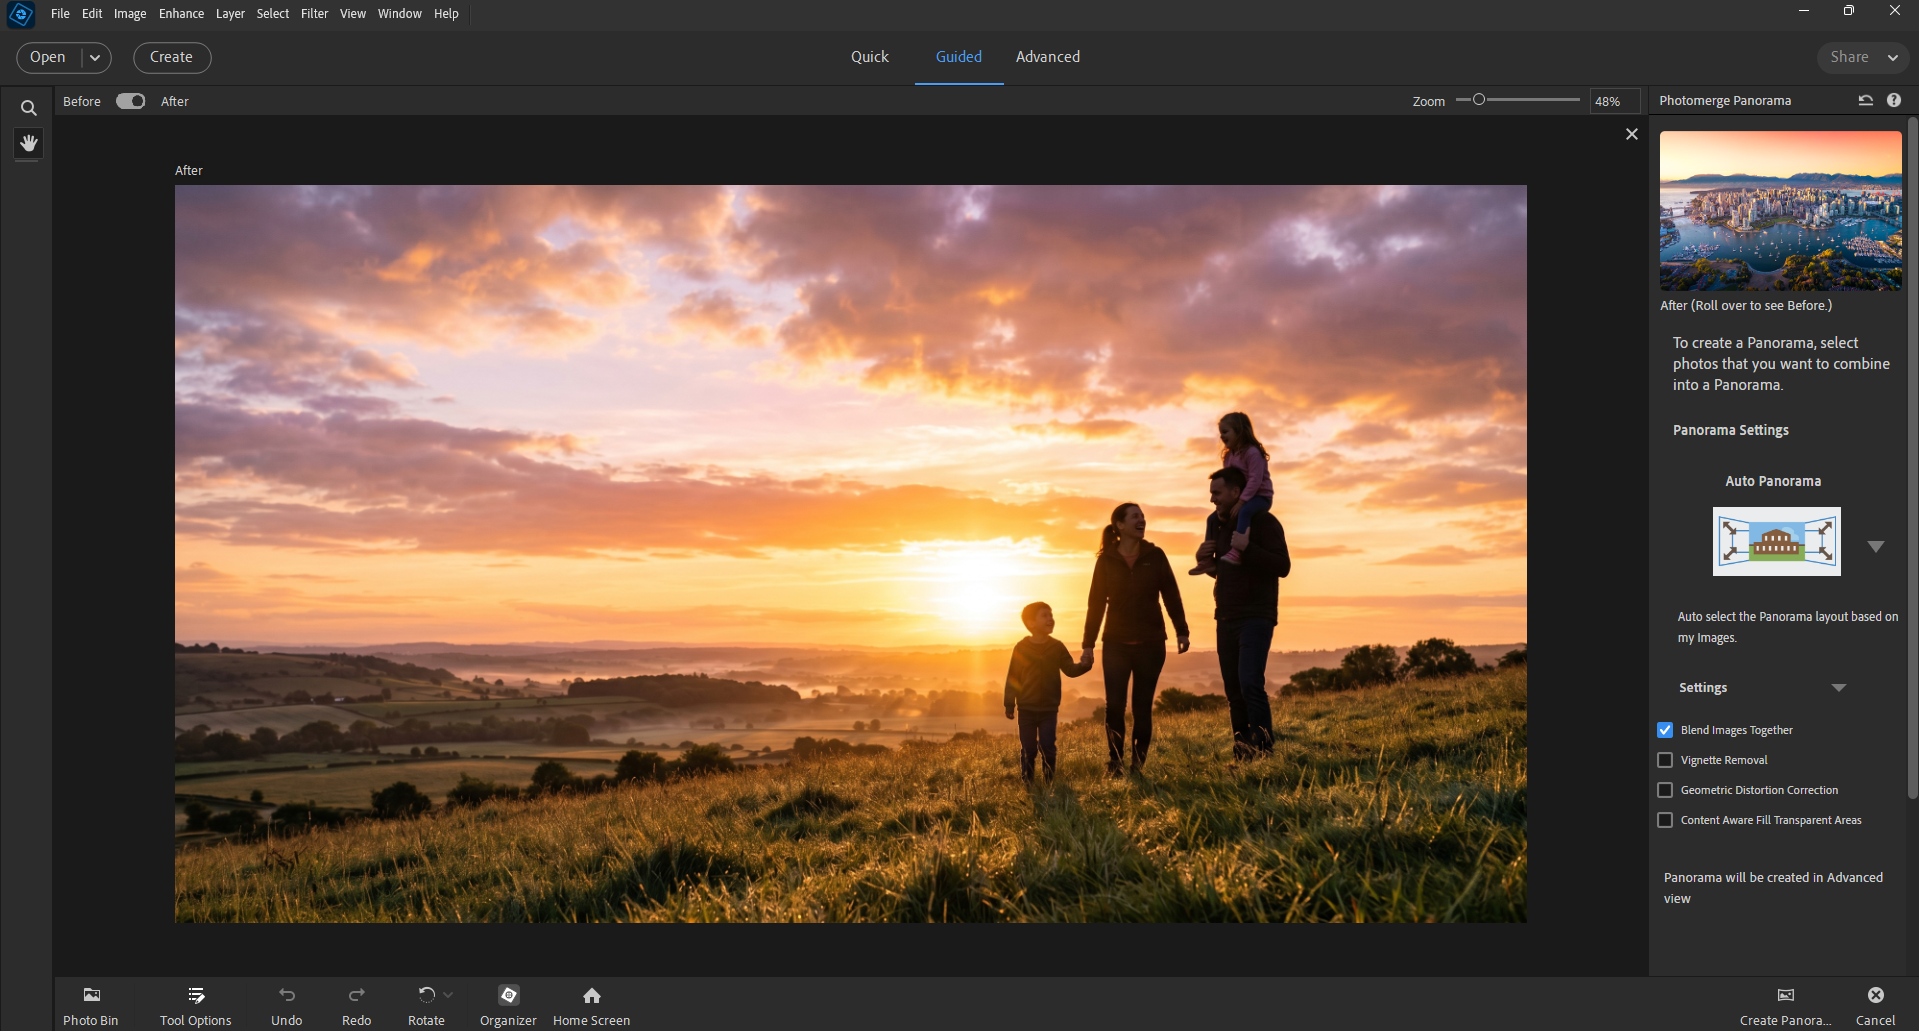
Guided mode (recommended if you are new to it): Open your photos in Elements. Click Guided at the top, then select the Combine tab. Click Photomerge Panorama. The right-hand panel walks you through each step and shows you the settings clearly.
Advanced mode (faster once you know it): Go to Enhance → Photomerge → Photomerge Panorama. A dialog opens where you add your files and choose your settings.
Both routes produce the same result. Guided mode just shows the options more clearly and is easier to follow the first time.
When a panorama is the right choice
Panoramas shine for specific subjects:
- Wide landscapes — mountains, coastlines, valleys, city skylines at dusk
- Buildings too tall or wide for one shot — without distorting vertical lines
- Large group photos — 20 to 50 people spread in an arc that your lens cannot capture at once
- Interior spaces — grand halls, churches, living rooms you want to show in full
- Scanned oversized documents — old maps, large family trees, or vintage portraits too big for a flatbed scanner (more on this below)
Panoramas are not the right choice for everyday photos. A single, well-composed image of your grandchild's birthday beats a stitched wide view of the same moment. Use Photomerge when a scene genuinely exceeds what one frame can hold.
How to shoot photos that stitch well
The quality of your stitched panorama depends entirely on the photos you feed it. Five minutes of care when shooting saves an hour of frustration later.
Use a consistent camera position. Keep the camera in the same spot as you pan. A tripod is ideal — use the rotation head to pivot without shifting the camera sideways. Without a tripod, tuck your elbows tight to your sides and pivot from your waist, not just your arms.
Overlap each shot by 25–40%. After each frame, move the camera so roughly a third of your previous view appears in the next shot. Photomerge uses those shared areas to align the images. Too little overlap (under 15%) and the stitching fails. More is always safer.
Keep the horizon at a consistent height. If your camera has a level display or grid overlay, use it. A drifting horizon produces a wavy panorama that is hard to fix afterward.
Lock exposure and white balance. This is the single biggest cause of visible seams. On a phone, tap and hold on your main subject until the exposure-lock icon appears, then shoot the full sequence without lifting your finger from the scene. On a camera, use manual mode or the AE-lock button. Variable exposure between frames produces bright-and-dark stripes across the finished panorama.
Turn off auto-rotate. Some cameras and phones apply lens corrections or HDR processing to each image individually, which makes frames impossible to match. Shoot in standard mode.
Shoot more frames than you think you need. Eight overlapping shots at 40% overlap are far easier to work with than four at 15%. Extra frames give Photomerge more reference points and you can always discard frames you do not need.
Avoid moving subjects in the foreground. People walking through your scene, cars, or waves will appear twice or be duplicated across the seam. Either wait for the scene to clear or plan to fix duplicates afterward.
Step-by-step: stitching your panorama
- 1In the Organizer, select all the photos in your sequence. Hold Ctrl (or Cmd on Mac) to select multiple files.
- 2Go to Guided → Combine → Photomerge Panorama, or Enhance → Photomerge → Photomerge Panorama in Advanced mode.
- 3Your selected files appear in the source panel automatically. You can also click Add Open Files or Browse to add more.
- 4Choose your Layout option (see the full breakdown below).
- 5Tick the Settings checkboxes that apply to your photos (explained below).
- 6Click Create Panorama (Guided) or OK (Expert).
Photomerge analyses all your photos, calculates the alignment, blends the seams, and produces a single merged image. Depending on the number and size of your files, this takes anywhere from 30 seconds to several minutes.
The six layout options — which one to choose
This is the most important decision in the whole process. Each layout uses a different mathematical model to map your flat photos onto the panorama.
Auto (the safe default)
Elements analyses your photos and automatically picks the most appropriate layout from the options below. For most landscape and travel panoramas taken with a phone or modern camera, Auto gives excellent results without you needing to understand the other options. Start here.
Perspective
One of your photos — usually the middle one — is treated as the reference frame. The other images are repositioned, stretched, or skewed to match it geometrically. This corrects converging lines, which is useful for architecture and buildings.
The trade-off: very wide panoramas stitched with Perspective end up with a pronounced bow-tie shape (wide in the middle, narrow at the edges), which requires heavy cropping.
Best for: moderate-width panoramas (3–5 frames), architecture, any scene where straight lines matter.
Cylindrical
Imagine wrapping your photos around the inside of a cylinder. This layout places each image on that curved surface, which eliminates the bow-tie distortion of the Perspective option while keeping horizontal lines straight and accurate.
Cylindrical is usually the best choice for wide landscape panoramas — especially those spanning more than five frames or covering more than 120 degrees of view.
Best for: wide landscapes, coastlines, city skylines, any panorama wider than about five frames.
Spherical
Images are mapped onto the inside of a sphere. This is designed specifically for 360-degree panoramas shot in all directions — left, right, up, and down. It handles the extreme angles that make other layouts fail.
If you have ever used a phone's dedicated panorama mode and ended up with a full 360° sphere you can view in Google Photos or Facebook 360, you already know what this produces.
Best for: 360° panoramas, very tall panoramas that include both sky and ground.
Collage
Each source image is kept at its original scale and orientation, but Elements can rotate and reposition the layers independently. Unlike the other options, Collage does not warp or distort individual images to match their neighbours.
Best for: photo collages where some of your source images are already differently cropped, or when you do not want any geometric distortion applied to the frames.
Reposition
The simplest layout. Elements moves the layers to align them but applies no perspective correction, warping, or rotation. The images are simply placed next to each other at their original orientations.
Best for: scanning oversized documents in sections (see below), photographing a painting or artwork flat-on, any scene where the camera barely moved between shots.
The four settings checkboxes
Blend Images Together (leave this ON)
When ticked, Elements calculates the optimal seam line between each pair of overlapping images and color-matches both sides of the seam so the transition is invisible. This is on by default and you should almost always leave it on.
If you turn it off, the images are simply laid on top of each other with no blending — you will see hard edges at every join.
Vignette Removal
Lenses — especially wide-angle and kit lenses — produce slightly darker corners in each photo (called vignetting). When photos with vignetting are stitched together, you get a repeating dark-edge pattern across the panorama.
Turn this on if: you are shooting with a kit lens or a wide phone lens, you can see darkened corners in your individual source photos, or the stitched result has a striped pattern of light and dark bands.
Leave it off for: photos shot with high-quality lenses or cameras that correct vignetting automatically.
Geometric Distortion Correction
Wide-angle lenses cause straight lines to appear slightly bowed — barrel distortion curves lines outward, while pincushion distortion curves them inward. This setting corrects for that.
Turn it on when stitching photos of architecture, rooms, or any scene where horizontal and vertical lines should be perfectly straight. It is less important for natural landscapes where slight curves are invisible.
Content Aware Fill Transparent Areas
After stitching, the outer edges of your panorama will be uneven and jagged — because your individual frames did not perfectly cover a neat rectangle. This leaves transparent (empty) areas around the edges.
When this checkbox is ticked, Elements uses Content Aware Fill to generate believable image content to fill those empty areas, extending the sky, ground, or background to reach a clean rectangular edge.
This works extremely well for sky and simple backgrounds. It is less reliable for complex detail near the edge.
If Content Aware Fill does not produce a convincing result, simply use the Crop tool to cut off the ragged edges instead. A tight crop is often cleaner than a generated fill for landscapes with detail at the borders.
Cleaning up the stitched result
Even with Blend Images Together turned on, panoramas sometimes need a little polish.
Visible seams: Zoom to 100% and scroll along the joins. If you see a slight colour shift or a ghosted double-image, paint over it with the Spot Healing Brush tool. Set the brush size to just wider than the seam and paint along it in a single stroke.
Duplicate moving objects: A person or car that moved between frames may appear twice. Select the duplicate with the Lasso tool, then use Edit → Fill Selection → Content Aware to replace it with generated background.
Wavy horizon: If the horizon curves gently up or down, go to Image → Transform → Skew and drag a corner handle to straighten it.
Colour stripes from uneven exposure: If you have clearly lighter or darker bands running vertically through the panorama, you locked exposure too late. In Advanced mode, use the Gradient tool set to Multiply blending mode on a new layer to even out the brightness manually, or use Enhance → Adjust Lighting → Shadows/Highlights on the whole panorama.
A special use: scanning documents too big for your scanner
Most flatbed scanners handle a maximum of A4 or letter-size paper. Many family archive items are larger: oversized family portraits from the 1940s, genealogy wall charts, old newspaper clippings, vintage maps.
You can scan these in overlapping sections and use Photomerge Panorama to combine them into a single high-resolution digital file.
- 1Place the document on the scanner. Scan the left portion at 600 DPI or higher and save it.
- 2Slide the document so the right portion is on the glass, with a generous overlap of at least 30%. Scan again.
- 3Repeat for as many sections as needed.
- 4Stitch the sections using Photomerge Panorama with the Reposition layout — no warping needed for flat documents.
The same technique works vertically. A very tall newspaper clipping can be scanned in three sections and assembled cleanly.
For family historians, this is one of the most useful things Photoshop Elements can do. Items that have been inaccessible for decades become sharp, shareable digital files you can email to relatives or print at any size.
Saving your panorama correctly
Panoramas can be very large files — especially if you stitched eight or ten high-resolution frames together. Save them thoughtfully.
Save the master as a TIFF. Immediately after stitching a successful panorama, go to File → Save As and save a TIFF copy. TIFF preserves every pixel of quality with no compression loss. This is your archive master.
Save a JPEG only for sharing or printing. When you need to email the panorama, post it online, or order a print, use File → Save As again and save a JPEG copy at quality 10 or higher. Never overwrite the TIFF with a JPEG.
Check your pixel dimensions before printing. For a sharp 10 × 30 inch print, you want at least 3000 × 9000 pixels (300 DPI). Panoramas stitched from phone photos usually exceed this easily. If yours is smaller, order the print at a proportionally smaller size — or accept that it will look soft at very large dimensions.
Printing panoramas
A wide panorama printed on canvas or photo paper and hung on a wall becomes a genuine conversation piece. The most common sizes to order are:
- 8 × 24 inches — fits above a desk or console table
- 10 × 30 inches — a statement piece above a sofa or bed
- 12 × 36 inches — exhibition size, for your most dramatic landscape
Before ordering, check that your print service accepts panoramic ratios (most do). Your panorama will need to match a standard ratio (1:3 or 1:4 are most common) or you will pay for white bars at the edges. Crop it to match in Elements before ordering.
Troubleshooting common problems
| Problem | Likely cause | Fix |
|---|---|---|
| Photomerge fails to align | Too little overlap between frames | Reshoot with 40%+ overlap |
| Hard colour stripe at joins | Exposure not locked between shots | Use Blend Images Together; correct in Enhance > Lighting |
| Bow-tie shape | Perspective layout on very wide panorama | Switch to Cylindrical layout |
| Ragged edges after stitching | Normal — frames never align perfectly | Use Content Aware Fill or crop |
| Ghost image (person appears twice) | Subject moved between frames | Remove with Spot Healing or Content Aware Fill |
| Horizon curves up or down | Camera tilted between shots | Image → Transform → Skew to straighten |
| Result is very small / low resolution | Source photos were small or heavily compressed | Use original full-resolution files |
Continue learning
- Related: Photomerge Group Shot — Combine Expressions for One Perfect Group Photo
- Related: Change a Photo Background with Combined Photos
- Related: Turn a Shoebox of Photos into a Family Photo Book